
The reason many new photographers end up going back to their phones is because of the amount of work required to make a good image with digital photography. So why does it seem like mobile phones capture better images than DSLR cameras?
As a general rule, mobile phones are not able to capture higher-quality images than a DSLR. But many photographers believe their images taken on a mobile phone look better because the phone automatically adds contrast, saturation, skin softening, and background blur.
By adding saturation, contrast, and warming the tones automatically, mobile phones are able to achieve the look professional photographers edit in themselves.
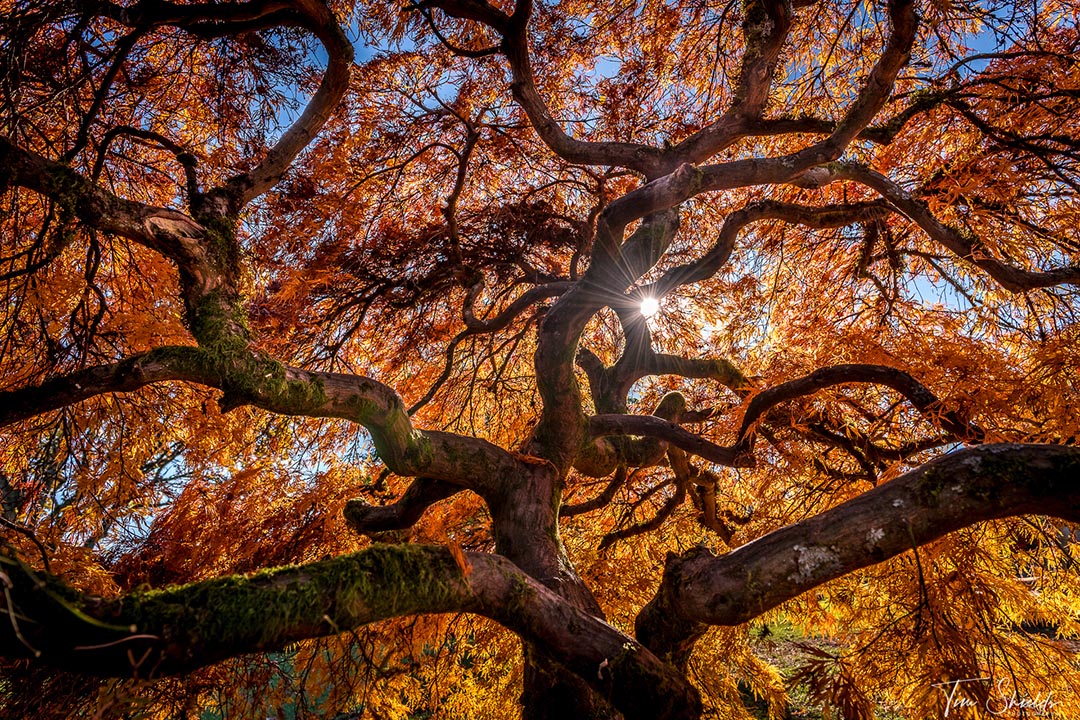
The dynamic range in digital cameras has far surpassed film over the years. And modern HDR techniques make it almost possible for our digital files to have as much dynamic range as our eyes do! But the problem is that many images coming from digital cameras come out kind of flat and lifeless. It’s great for editing, as there’s room to interpret or make adjustments after the fact. But it often means that to make an amazing image, we need to do some more work to make those images pop!
In this article, I’m going to teach you what phones are doing, and how you can copy that to make way better images with your DSLR.

This is the first question that we have to ask when comparing photos from our phone and camera. You can use the same focal length but get a radically different image. Sometimes, the differences are huge due to a few simple reasons.
Your phone is automatic, but your DSLR requires a lot of manual control. This usually means that a mobile phone is doing a lot of work behind the scenes that you can’t control. For photographers like me, that simple fact is frustrating, because it does a lot of things that I don’t want it to. But for most users, it’s so good that they’re putting their DSLRs down forever.
Mobile phones achieve the quality of images they do thanks to computational photography. Most phones are actually taking multiple photos in a short burst and then combining and editing them very quickly. If you watch carefully, you can typically see a dull, flat image on the screen for less than a second while the phone processes it.
When the phone is finished processing, images will become more saturated, faces will be brighter, details will be sharper, and the tones are typically warmer. It’s fascinating to see. And it honestly provides a really good lesson to photographers. If Google and Apple are making these changes to every single photo taken on their cameras, it’s likely that these changes were heavily researched to find the magic formula that humans like to see.
Once you know that formula, adding it into your own photos will help them keep up with the pace of modern photography.

This is the fun part. Because the majority of changes that a mobile phone is making on the fly can be done with just a couple of sliders in Lightroom. You’ll have way more control over the images in Lightroom, so once you learn these tricks, it’ll be easy to make images pop!
The main settings mobile phones are automatically adjusting are as follows:
Temperature: phones usually make images warmer. This is because skin tones look nicer when they’re more saturated into the orange and yellow hues. You can make people look better, and scenes look dreamier by warming the images up.
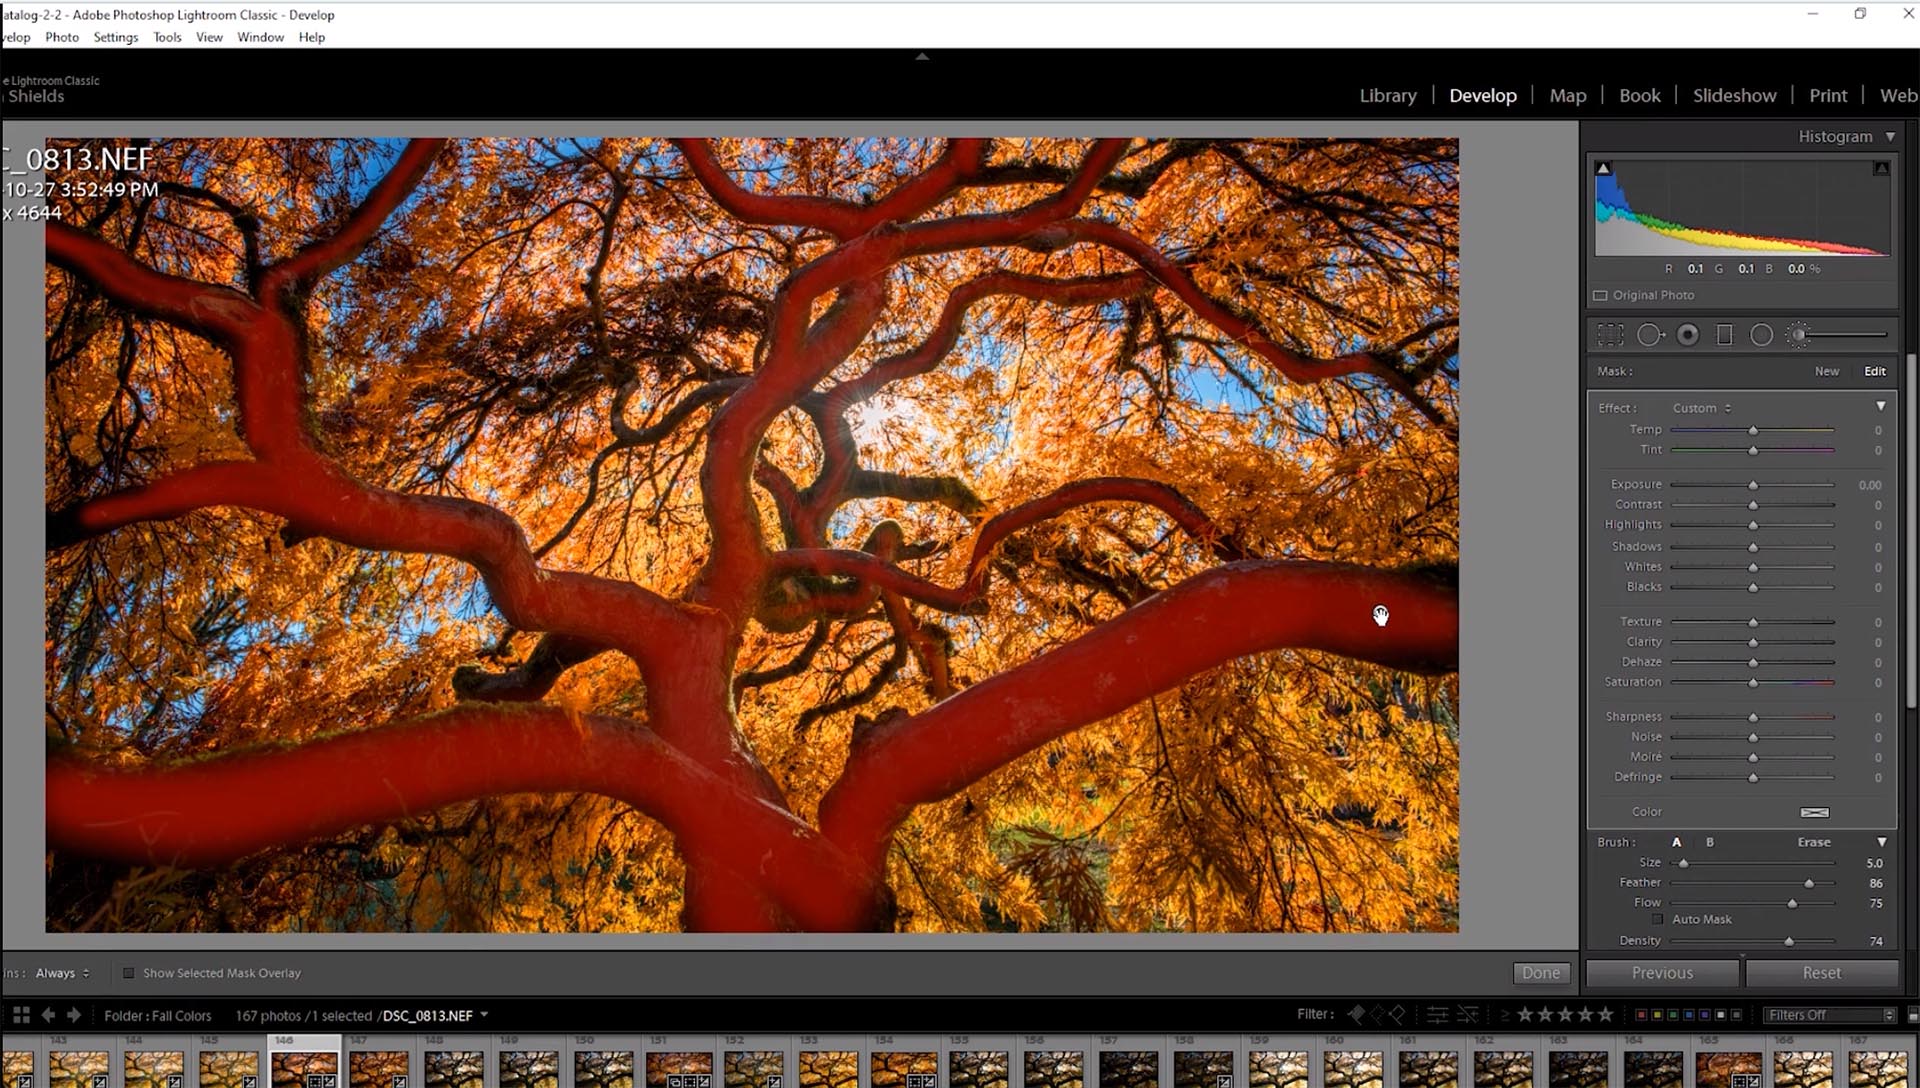
Contrast: Contrast reduces the dynamic range in the scene, and makes the highlights stand out more against the shadows. Typically this slider brings some life back into your images. When you want more control, you can use the highlights/shadows to adjust mid-tones, and whites/blacks to add some beautiful contrast to the images. Every time I raise the shadows, I darken the blacks to keep some texture in the image. Having a good black and white point is important.
Clarity/texture: this is how sharp the image is. Cellphones typically add a little bit of clarity to the scene so give edges some more contrast. But they reduce the texture on faces so that the phones don’t show blemishes or uneven skin tones. You can use an adjustment brush to selectively remove texture on the skin for great effect.
Saturation/Vibrance: Cell Phones usually bump up the saturation to make images stand out. In Lightroom, you have the choice between saturation and vibrance. Vibrance controls the more muted tones, while saturation controls everything. Typically I use the vibrance slider before the saturation because it’s a little more controlled.
Google and Apple use AI to know when there’s a face in the photograph. Once they see a face, they know to soften the texture and to make it brighter in the image. This makes sure that all faces are the subject of an image and makes sure there are no unnecessary distractions.
We can use this as a lesson for our own photography. If you’re taking a photo of a person, you’ll want them to be the focus of the image, but you also want to make sure they look as good as possible. The easiest way to achieve this is through local adjustments. In Lightroom’s Develop module, open a local adjustment brush by clicking the paintbrush icon on the right side of the screen just under the histogram. Or you can press the letter K on your keyboard.
Once you have an adjustment brush open, choose any combination of settings that you’d like used in a single area using the sliders. If you want to make people stand out, the easiest way is to lightly increase the exposure, open the shadows, and bring down the texture. Then paint this onto the subject’s face to make them brighter and soften skin texture.
There are people who believe these techniques are immoral. But they’ve been around even during the film days. In the 90s, people used to make images like this using a ‘soft focus’ lens on their film cameras. These lenses were designed to reduce sharpness so that blemishes and textures didn’t distract from a good portrait. As far as ethics go, if it’s going to go away in two weeks, get rid of it and people will thank you for it.

If you’ve got a lot of photos to go through, it can take a very long time to brush everyone’s faces. I get that, and I often go to other quicker methods if I need to go through a hundred photos.
The fastest way to brighten all skin tones in a set of images is actually pretty ingenious. It uses the HSL panel just below the tone curve on the right side of Lightroom in the Develop Module.
Once you’re in HSL, choose luminosity. And here you’ll see sliders that correspond to all of the colors of the rainbow. And this is where it gets cool. Most people have orange skin tones. So for the vast majority of cases, it’s possible to lighten all skin tones in an image by dragging the orange slider to the right.
The caveat here is if you’re shooting at night with a lot of colored lights. Then this technique doesn’t work as well. In that case, you can use the color picker tool on the top left of the HSL panel. Once you click the color picker, then go and click on the tone that you’d like to adjust on the screen. Click and drag the mouse to the right to increase the slider, or to the left to decrease the slider. It’s a brilliant tool that makes the whole process way too easy.
Using adjustment brushes to lighten and darken part of the scene is a technique called Dodging and Burning. It’s been around since the advent of photography and remains one of the most powerful tools available to photographers when they want to make parts of their image stand out. I’ve written a whole article on dodging and burning here, so this one will get into the basics of how to do this.
To dodge, simply open an adjustment brush by pressing K, and then dial in some adjustments that will brighten the scene. Typically I use exposure since it evenly brightens the entire spectrum at once. But if something is shadowy, I’ll use exposure to the right and shadows to the right to focus on brightening the shadows.
Dodge everywhere in the image where you want the user’s attention. Bright areas contain more detail and keep the viewer’s attention longer. Naturally, the eye always wants to go where it can get the most information, and that is always in the brighter areas of the photo.
So if there’s anything in the image that serves as a distraction, you’ll want to darken it by burning. To burn, simply lower the exposure, bring down the shadows and the blacks in an adjustment brush. This will reduce the amount of visible information in that part of the image, and it will direct the viewer’s attention to the brighter sections.
This is perfect because a lot of landscape photographs have distractions that’ll hold the viewer’s attention longer than you want it to.
Just be careful to make sure that you’re not dodging and burning too much. If you start noticing the effects going over the edges of the image, you’ve likely gone too far.
 Now that you know how mobile phones are making better images than the ones that come straight out of the camera, it should be easy to do way better with a DSLR or Mirrorless camera of your own! These tips are easy to implement, but they can take a lot of time to learn how to do just right. If you’d like to speed up that process, I’ve developed a number of courses that’ll help you along your photography journey. These lessons are all based on my experience as an award-winning fine art landscape photographer. And I know that with some knowledge, it’s easy to make stunning photographs even close to home and with the gear you already have! Sign up for my free online web class today to get started on your journey towards becoming a full time professional photographer!
Tim Shields is the founder of Photography Academy, the author of The Photo Cookbook, and the creator of the Photography Transformation 4-Step System. He holds the designation of Master Photographer in Fine Art from Master Photographers International.


