
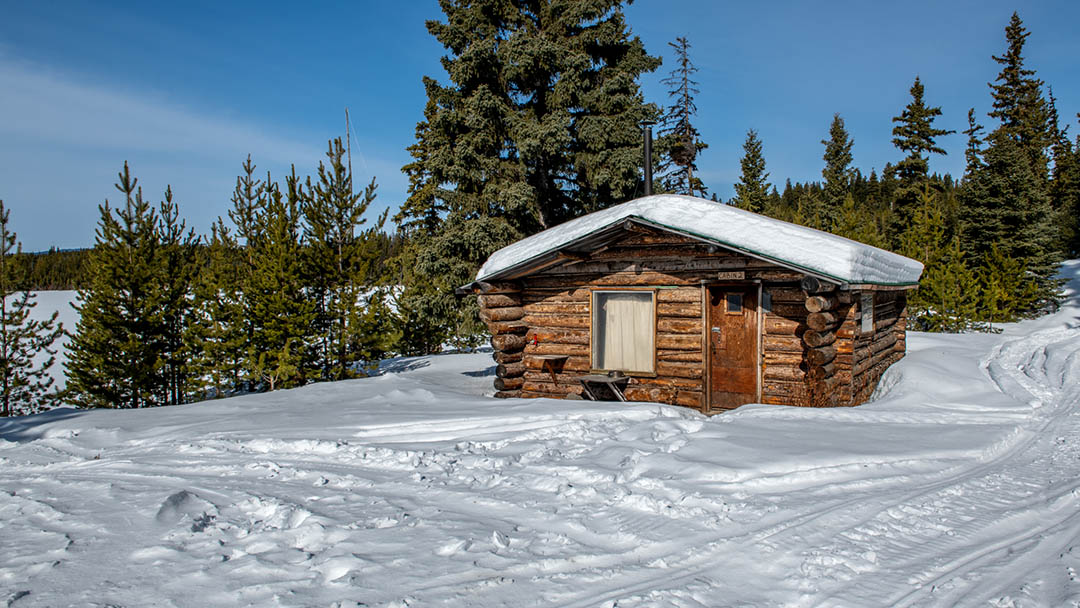
On one of my recent winter photography trips, I came across a unique cabin in the middle of the mountains and I just had to compose a couple shots. It’s one of those very special scenes that you come across every now and then. Something so calm and picturesque that you can’t help but stop and take a long look at it. You might even snap a photo to see what happens.
In this case, I composed four different shots of the same cabin, but it got me thinking about all the different ways I could compose the same scene. In photography, there are a virtually unlimited number of ways you could compose an image, but there are a few standard techniques for getting started on that path.
Here are some of my favorite ways to teach new photographers how to compose an image. If you can spend a day or two at a specific location, you’ll see how the weather and the position of the sun can drastically change how the image turns out. With this practice, you’ll know exactly what to plan for, and you can turn photography into more of a science. Serendipitous photography is fun, but if this is something that you want to turn into a career, you’ll need more than just the ability to stumble on the right place at the right time.
These are all going to be short descriptions of the types of framing, but I’ll link to longer articles on many of the different topics. So check out the links in each description if you’d like to learn more about these composition techniques.

Do you want that cabin to be the only thing in the frame? Or do you want it to be smaller to bring in some more of the context around it? Do you have a lot of space to work with? Or is there just a small clearing to work with?
If your subject is in a vast plain, surrounded by rolling hills with mountains in the background, you’re going to want to use a telephoto lens to bring it all together. If you’re working in tight quarters, a wide-angle lens will give you the most options. To make the cabin look absolutely majestic, get up close and personal with a wide-angle lens, and use that distortion to make it look large and proud in the frame.
Thought Processes when choosing focal lengths for framing
That’s about as far as I’m going to go in terms of gear. Because with some knowledge, it’s easy to overcome any of the limitations that gear might pose. And this is especially true with landscape photography. You can read more about getting pro results with entry-level gear here.

There’s a lot of power in composing with a centered frame, and don’t let anyone tell you otherwise. Centering the subject into the middle of the composition gives the image balance. The left, right, top, and bottom of the image all lead the eyes into the very middle of the frame.
It’s a popular technique among landscape photographers, and it’s one that I use all the time. Especially in travel photography, when I’m taking a photo of a cabin, church, or small village among a mountainous scene, this type of framing is glorious. It puts the human element front and center, and it makes the viewer feel like they’re there.
This is the most textbook way to compose a photo because there — it’s by far the most common and well-known technique. If you’re new to using this rule, most cameras can show a rule of thirds grid overlay in Live View mode so you don’t have to visualize it.
The rule of thirds helps to neatly organize a photo by putting the subject into specific positions within the frame, usually on the right or to the left. Using the rule of thirds will give you space to add foreground/background interest, leading lines, or vignetting to bring the viewer’s attention to the subject. In the case of the photograph above, leading lines could be the treeline, the mountain ridge, or even a trail in the snow leading directly to the front door.
The beauty of the rule of thirds is the empty, or negative, space around it gives you room to emphasize other objects in the scene. In this case, I can highlight the trails on the right-hand side of the frozen lake that’s off to the left. In the summer, that mountain lake would be absolutely stunning, and would likely make for a beautiful scene.
Thought process when choosing to frame in the center, or off to the side:
Once you’re bored of the Rule of Thirds, there’s another common type of composition called The Golden Ratio. And yeah, it’s as beautiful as it sounds. The Golden Ratio is way more common than you may know. And when you know how it works, you’ll start seeing it everywhere.
The Golden Ratio or Fibonacci Spiral creates a mathematically balanced photograph based on the ratio 1:618. Typically there will be a large subject in the center of the frame and another, smaller subject in one of the corners. The remaining space is typically empty and used to draw the viewer’s eye around the frame.
The golden ratio creates a unique symmetry based on natural patterns, like those found in flowers, snowflakes, and drops of water. Because it’s based on nature, you’re likely making this in your photographs without even knowing it!
I’ve written another article on balancing photos and using these compositional techniques here.
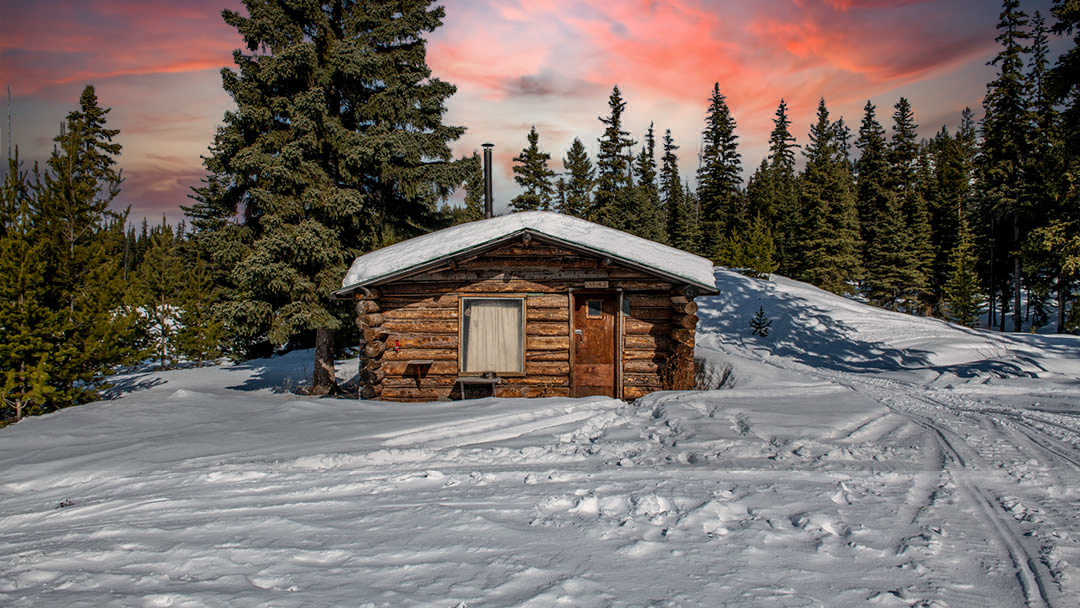
Once you’ve got the framing down, the next step is to start thinking about the light. The one unfortunate part about these photos above is that I didn’t have time to wait until sunrise or sunset. So for this example, I just replaced the background using Photoshop’s amazing, automatic sky replacement tool. It’s seriously the best tool I’ve ever seen for making this change, and there’s no shame in doing it. But why do we wait for sunrise or sunset?
Sunrise and sunset increase the amount of contrast in a given scene. The colors of the sky are not typically found in nature, so they pop out from the ground. But also, the direction of the sun casts large shadows that create interest.
If you don’t have time to go out and wait for the perfect light, you can always make a plan for the right weather. There are plenty of brilliant, free services on the Internet like Suncalc.org, which will show you where the light will be pointing at every time of day. Then, when you know how to plan for a good sunset, you can be certain you’ll get to that perfect location at the perfect time.

Most times when you’re out taking photos, you’ll want to get the most dynamic range possible in the scene. This usually means that you’ll underexpose the shadows slightly, and over-expose the sky slightly. When done well, you’ll capture enough information to bring up the shadows and to not burn out the sky.
But often you’ll sacrifice some of those gorgeous, saturated colors when you do this. So when you really want to show off that sky, try making the cabin into a silhouette. This is a really powerful technique because it gives the user someplace to bring their imagination into the image. The other benefit is that nobody will ever know about that dreary, drab foreground.

This is the last lighting tip and is for those who have a lot of time on their hands. If you have a tripod and a wide-angle lens, it is always a lot of fun to capture the stars. Turn the lamps on in the cabin windows as well, for an especially cozy look and feel.
You’ll need the fastest, widest-angle lens possible — especially if you want to capture the Milky Way. Due to the Earth turning, exposures longer than 25-seconds will start to capture light trails. This is not desired if you want to capture the stars at their sharpest. That said, if you’re into light trails, you’ll need to plan to be outside for 4 hours or so, depending on the location.
You can learn more about capturing the stars in this article.
Digital cameras don’t have enough dynamic range for every scene. Our eyes are really good at capturing the details at sunsets, mid day when there is the most dynamic range in the scene. But cameras need a little bit of help.
If you don’t want to sacrifice any of the colors in the shadows or highlights, you can use HDR photography to ensure you’re able to get it all in one image. This technique requires a tripod, and for you to take three exposures at different shutter speeds. One set to capture the highlights, one for the mid-tones, and the other for the shadows. In post-processing, HDR photos will look flatter than normal images, so you’ll have to edit in some contrast. But once you’ve got the technique down, you’ll be able to create some absolutely stunning, fine-art landscapes.
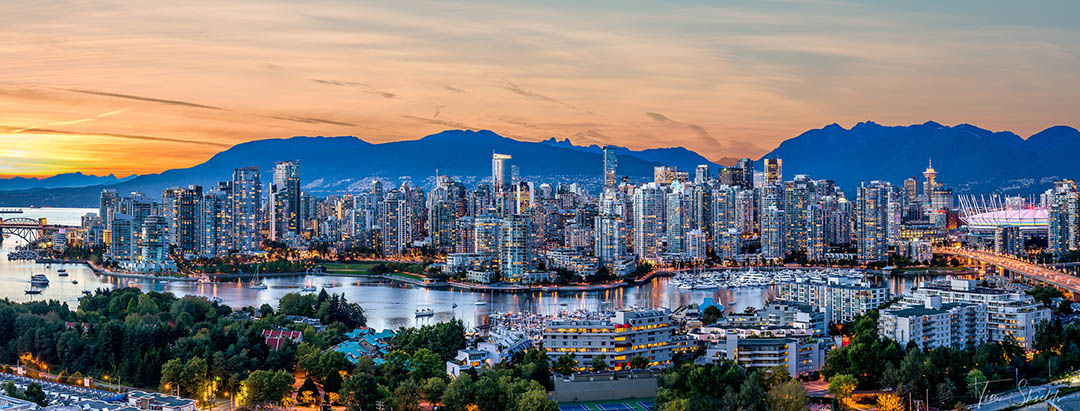
Panoramas are my absolute favorite technique for capturing everything in a scene without getting the wide-angle distortion. Making multi-row panoramas creates gigantic images that can be printed at any reasonable size.
But the best part about them is that you capture way more detail than will ever be possible with a wide-angle lens. When you zoom in to 400%, it’ll be like zooming in on a full-resolution image! It’s crazy, and so much fun to do. You can read more about this technique on my getting pro results with an entry-level camera article here.

Creating a long exposure or timelapse can bring some real interest into the scene. This is mostly for somewhat cloudy days, as you need to capture some of that movement in the sky. Showing the passage of time like this is a really fun technique. And it can turn simple daytime images into masterpieces if you don’t have the time to wait until sunrise or sunset.
The problem is that in the middle of the day, you’ll have to have something to block the light. Even at f16 and ISO 100, you’ll be able to take a photo at 1/250th of a second no problem. So the best way to block the light is to use a Neutral Density Filter. To get an exposure longer than 10 seconds, a 10-stop filter is usually enough. But you’ll need a way to focus before putting the filter on the lens.
The last tip is to take photos throughout the seasons! There is so much change that happens over time. The new growth of the spring, summer skies, fall foliage, and winter vibes all bring their own nuances to a scene. This can be great for an essay showing how quickly time passes, or just for exploring the different possibilities of a single landscape.
This is especially fun if the scene is close, or on the way home from work. Taking photos throughout the year is a great way to try out new equipment and techniques for making stunning imagery. It’s definitely worthwhile to try out.
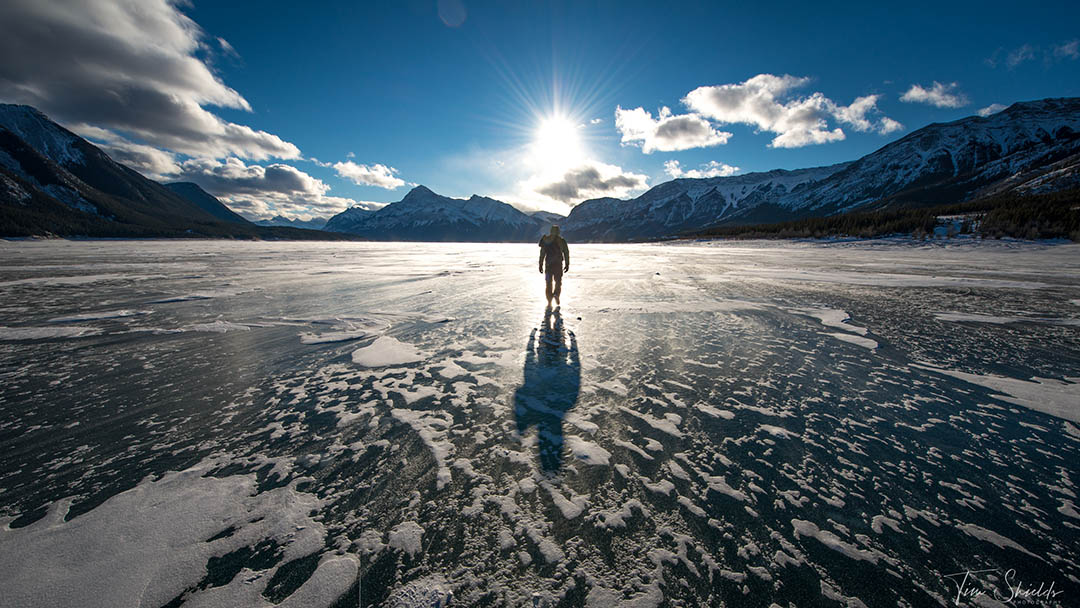
Sometimes the last touch an image needs to really stand out is a human. You could have traveled to one of the most interesting places on Earth, but still struggle to create a narrative. When that happens, sometimes the best thing you can do is add a person into the scene to make people connect with it more.

I’ve been reading a lot about other landscape photographer’s work, and this is a theme that keeps coming out lately. One of the photographers talking about this is Paul Zizka, who is a major inspiration of mine. In this post, he says “It sometimes takes a human touch to convey a sense of awe and scale.”
A camera lens distorts so much of the world. It can make objects look way larger or smaller than they actually are. So it absolutely makes sense to put a human into the scene to show people what exactly they’re looking at. This is why images on Instagram of people posing next to waterfalls, or on overhanging rocks are so powerful. It gives the image a sense of peace, purpose, and makes the scene relatable in a way that it can’t without a human there. If someone is in the frame, you’ll imagine what it took to get there, and what they’re feeling.
So when you come across a scene that’s just not working the way you’d like it to, add a human. And I guarantee it’ll make a more compelling image.
 Once you’ve exhausted this list, you’ll be very well on your way to becoming a fine-art landscape photographer. I’ve got so many different tips on this blog that are all free for everyone. And many of the tips are ones that I wish I’d learned when I was younger. But to get the secret sauce that makes those images really stand out like the ones that win awards, you’ll have to come to check out my free online web class! Here I’ll tell you about the simple four-step system that has allowed me to get paid to travel the world with my family and friends by making fine-art landscape photographs!
Tim Shields is the founder of Photography Academy, the author of The Photo Cookbook, and the creator of the Photography Transformation 4-Step System. He holds the designation of Master Photographer in Fine Art from Master Photographers International.


